Introduction
The classic bicycle tyre, known as a clincher, requires an inner tube. Tubeless, as the name suggests, dispenses with the inner tube, but adds a liquid sealant inside the tyre to seal any holes. Tubeless has been popular in mountain biking for a long time, and is now becoming very common for road and gravel bikes.
My tubeless adventure began a few years ago. Full of positivity about the new setup I decided to share my (limited) knowledge with our cycling club, at a meet round a friends house. Ended up seriously embarrassing myself as the tyre wouldn’t seat on the rim. How little I knew.
Fast forward to now, I’ve got more experience, and the tech has improved a lot, so I thought I’d risk sharing again in the hope it’s useful.
Tubeless Pros and Cons
Advantages
- Removing the tubes reduces rolling resistance, making the bike faster.
- Sealant repairs most punctures reducing time spent changing tubes.
- Removing the tube avoids the risk of pinch flats.
- Supports lower tyre pressures for more comfort and/or better grip.
Disadvantages
- Additional complexity in setup
- Extra component and tool costs
- Ongoing maintenance to replace or refill dried out sealant
- General messiness of the whole setup.
- When sealant doesn’t block a hole it can squirt out everywhere
Tubeless Components
Wheel
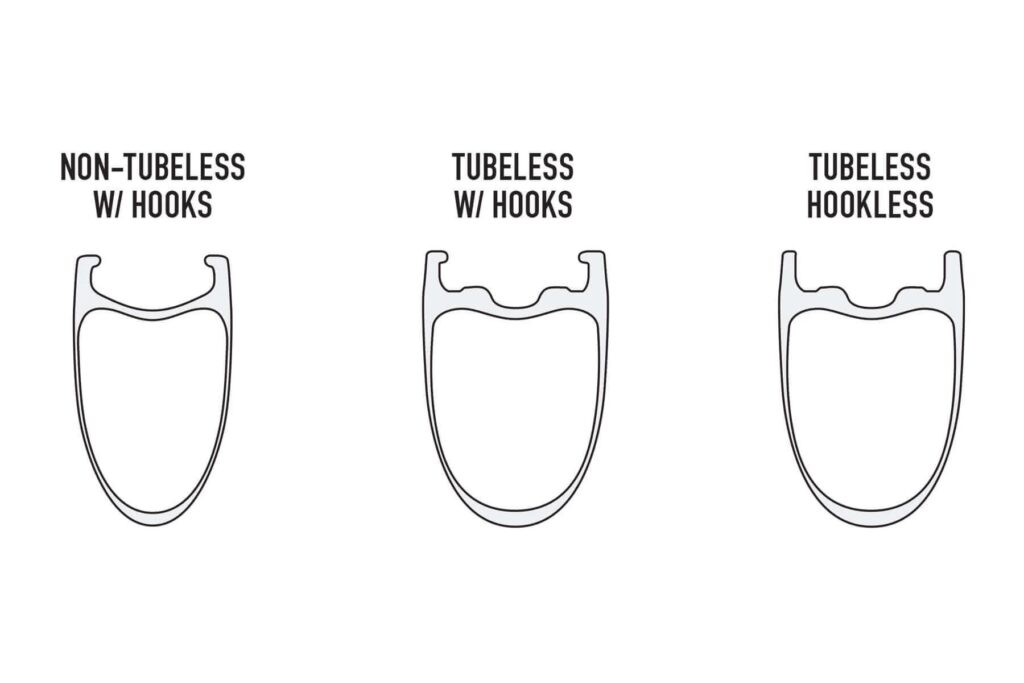
Any old wheel can’t be made tubeless, the wheel needs to be tubeless compatible. A specially shaped rim is required to hold the tyre in place in the absence of a tube. Near each side of a tubeless rim are bumps that the tyre has to pop over to create a seal against the rim edge, this is what makes the distinctive sound when inflating a newly fitted tyre.
There are two types of tubeless compatible wheels, hooked and hookless. Hooked rims hold the tyre more securely but are slightly heavier and more difficult (and therefore expensive) to make. Hookless rims typically have a lower maximum tyre pressure. See this article from Cyclist magazine for further details on the difference between them. If in doubt I’d recommend hooked rims.
Tyre
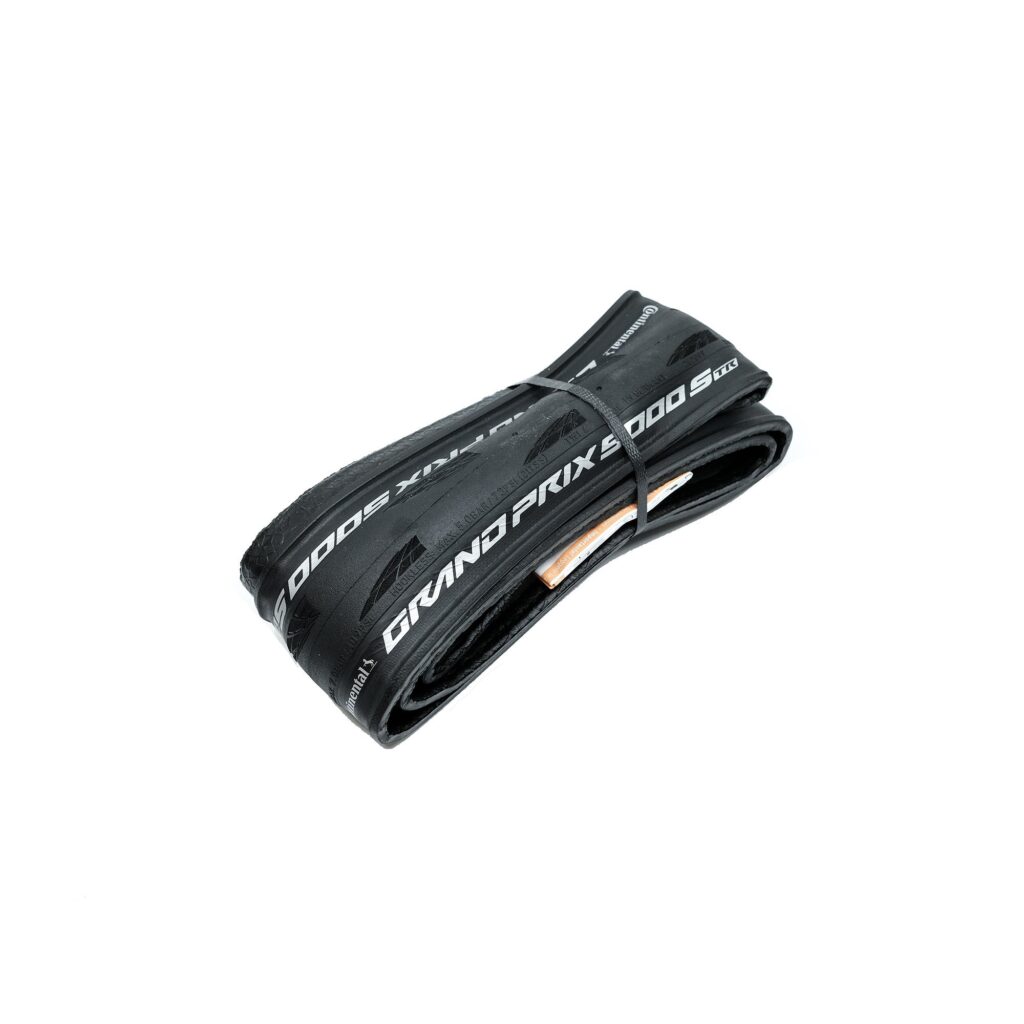
Like the wheel, the tyre has to be tubeless compatible. Further, not all tubeless tyres are compatible with hookless rims, and even if they are there will be additional constraints such as a maximum pressure. As an example, the 25mm version of the popular Continental GP5000s TR has a maximum pressure of 109 psi on a hooked rim, but only 73 psi on hookless. Check the wheel and tyre manufacturers websites if unsure. Popular road tubeless tyres include the aforementioned GP5000S TR (my current favourite), the Schwalbe Pro One TLE, the Specialized 2bliss (awful pun) range, as well as tyres from Pirelli, Hutchinson, Vittoria, Goodyear and others.
Valve
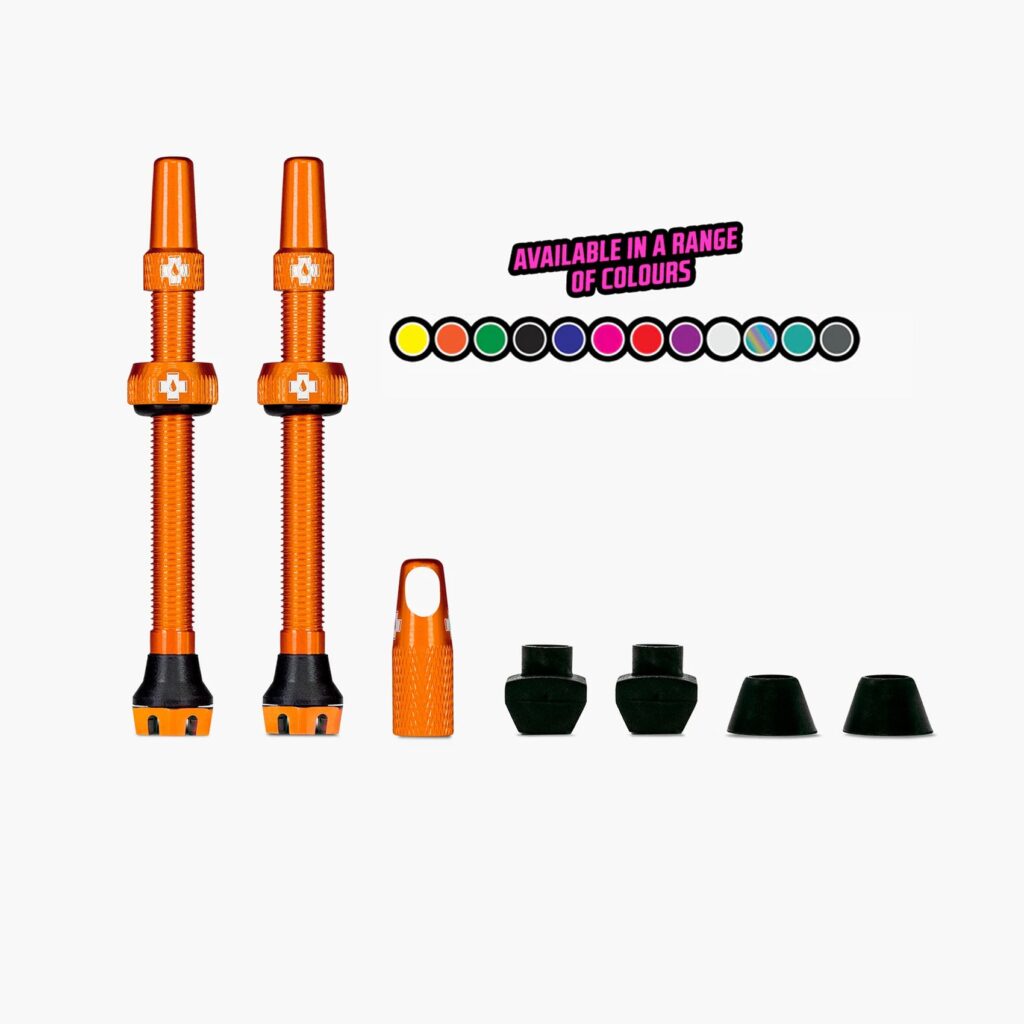
As there is no tube, the valve is fitted directly through the wheel rim. Tubeless valves have removable cores for the greater airflow needed to seat a tubeless tyre and to allow compatible sealant to be injected through the valve. Injecting through the valve is easier and less messy than putting sealant into the tyre before seating it, but not all sealants can be injected that way.
The valves may come with multiple rubber bases in different shapes to fit varying rim profiles, if in doubt use the round ones. Tubeless compatible wheels are often supplied with valves, but if purchasing, the best valves I’ve found are from Muc-Off. Be sure to buy a valve long enough to fit all the way through your rims.
Rim tape
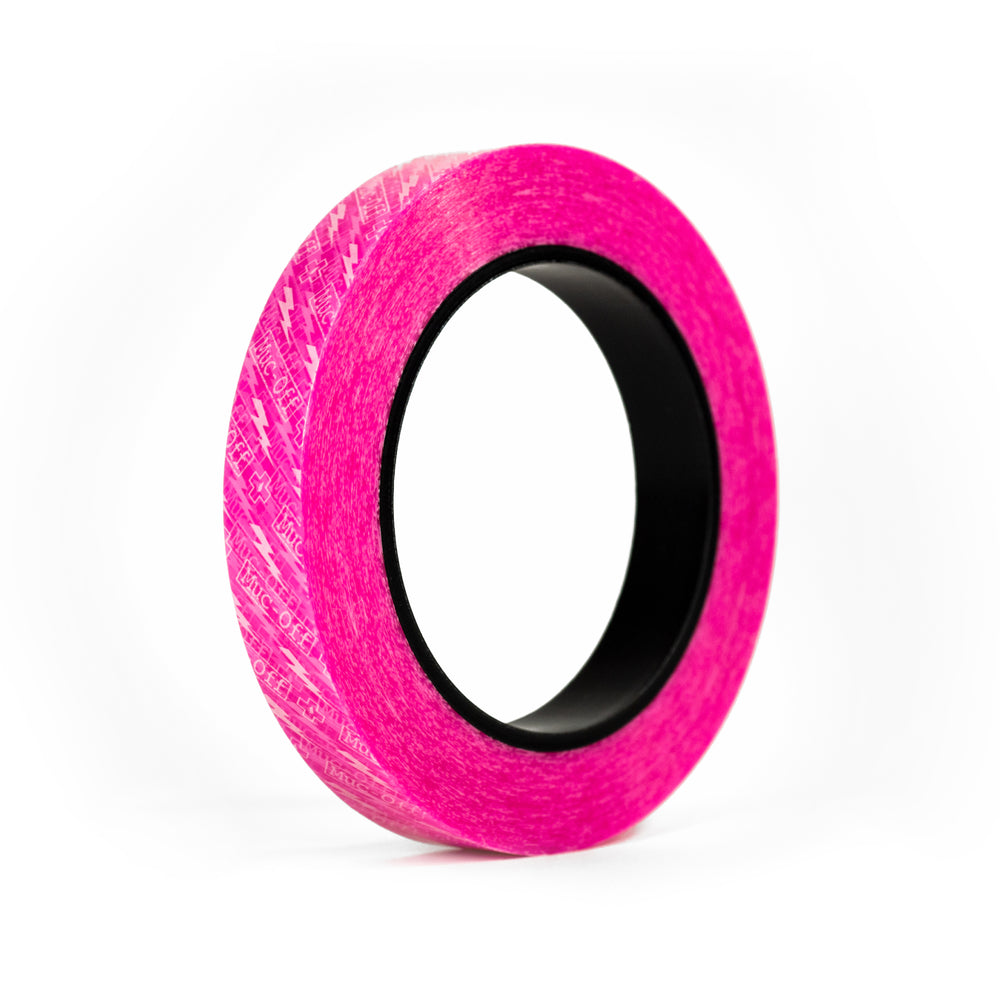
Most wheel rims are drilled for fitting the spokes, these holes allow air to escape so tape is used to make the rim airtight. Tubeless compatible wheels come ready taped, but note that manufacturers tape may not be as strong as aftermarket (I’m looking at you Roval) and can puncture at the spoke holes eventually. When buying rim tape it needs to be slightly wider than the rim internal width, so that it can fit into the central indent and still reach the edge of the rim. Adding 4mm to the internal rim width is usually about right (e.g. 25mm rim tape for a 21mm rim). Narrower rim tape might still work but is more likely to be damaged if removing the tyre. The best rim tape I’ve found so far is also from Muc-Off. It’s easy to fit, flexible enough to fit to the shape of the rim, strong, and sticks well.
The circumference of a rim is about 2 metres (pi * d) so allowing for some overlap a 10m roll of tape will be good for 4 rims.
Sealant
There are lots of sealants on the market. A popular option that does extremely well in reviews is from Silca, their latest (V2) can be injected through the valve instead of putting into the tyre before mounting and lasts for 6 months. Bear in mind that at the time of writing (March 2025) it’s very new and a few people have reported issues with it. Has worked fine for me, but I’ve only used it once so far.
Required Tools
Pump
Many new tyres will seat with a standard track pump, but a special pump with an air reservoir (sometimes called a charge pump) greatly improves the chances of seating the tyre by blasting a large amount of air in a short period. Some people use CO2 cartridges, but these are incompatible with many types of sealant, and the jet of freezing cold gas can damage the tyre.
Bike shops can have compressors to make it really easy.
Injector
If injecting sealant through the valve a special syringe is required. A wider tube that fits over the valve rather than inside it will work better, smaller tubes that go inside the valve will be clogged by the sealant. Best to buy one recommended by the sealant manufacturer.
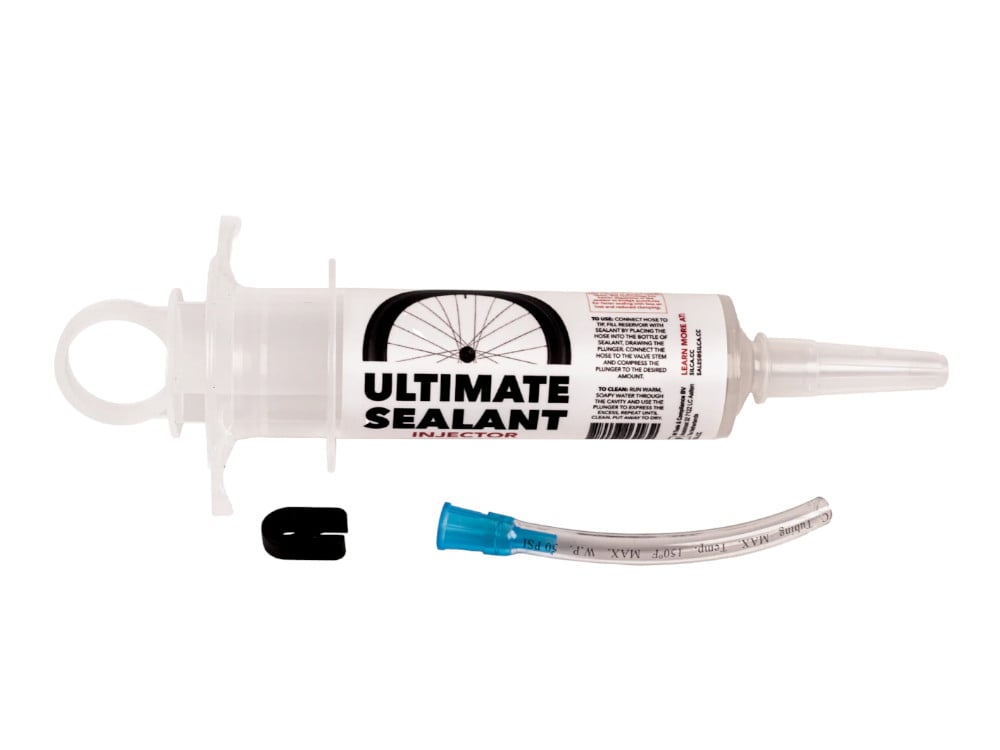
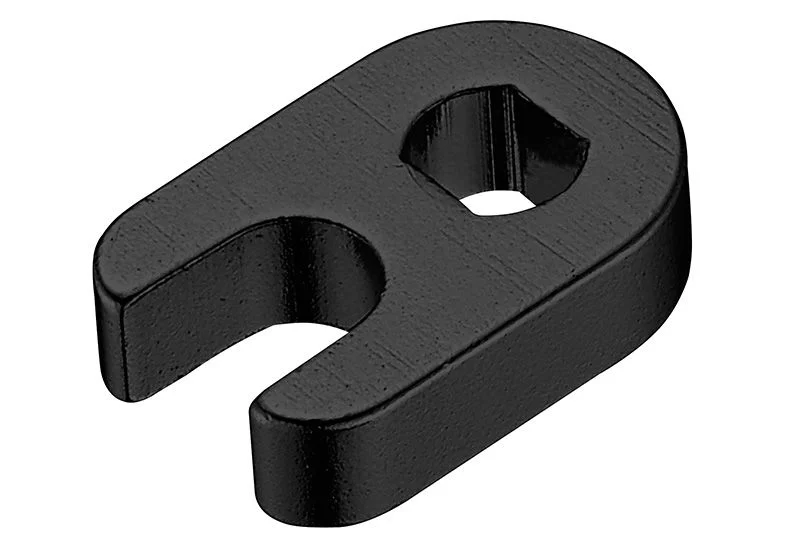
Valve core removal tool
While a pair of pliers works, its much better to use a small tool to unscrew the valve core. They’ll often be supplied with tubeless components (Silca include one with their injector). A good option is to use valves that include one in the valve cap, like those from muc-off.
Rags/cloths
At some point you’ll spill some sealant. Have a cloth ready. And a hose. And some excuses.
Setting it Up
Be warned this can be messy, it’s best done in a garage or outside. At least don’t do it in the living room on your carpet.
Preparing the wheel
Remove the tyre, tube if used, any old sealant and damaged rim tape, make sure the rim is clean and free of dust, dirt and grit so a good seal can be obtained. If not replacing the rim tape make sure it’s evenly fitted to the edge of the rim and is not punctured at any spoke holes. If in doubt it’s best to replace it.
Fitting the rim tape and valve
Start one spoke hole away from the valve, keeping the rim tape taut and central stick it down on the rim bed. Make sure the tape is sitting snugly inside any central indent and not stretched across it, or the tyre will be very hard to fit.
Continue around the wheel until at least one spoke hole past the valve, cut the tape and make sure its properly fitted all round the wheel.
I designed and 3d printed a tool to help with aligning and pressing down the tape, but this is a bit niche.
Using a sharp knife cut a cross in the tape at the valve hole to allow fitting the tubeless valve.
Push the valve through the hole, add any external washers and tighten the locking nut. Some valves like those from Muc-Off have a hex shaped hole to hold them in place with an allen key while tightening the locking nut. The nut should be hand tight, don’t squash your expensive wheel by using pliers or anything.
Visually check the valve is fitted snugly, some valves come with multiple rubber seal options, I recommend using a round one as other profiles don’t always seal well against the rim and can allow air to leak at the sides, as well as being vulnerable to rotating with the valve and unsealing when putting on the valve cap too enthusiastically.
Fitting the tyre
Fitting the first side of the tyre should be easy enough, but the second side can be a challenge. Make sure the tyre is sitting in the central indented part of the rim, and work around it fitting the section around the valve last. Try and avoid using tyre levers if possible as these can damage expensive carbon rims. If struggling to get the last section over try going round the tyre again when its tight and making sure its sitting centrally inside the rim well.
Once fitted make sure the tyre is sitting either side of the valve, and not on top of it as otherwise it won’t seal when inflating in the next step.
Inflating the tyre
Tubeless wheels have a small lip near the edge of the rim and the tyre needs to pop over this to fit properly. This can need a decent blast of air, so remove the valve core to allow maximum airflow, once the tyre is seated properly it won’t unseat even when air is removed.
Inflate the tyre until it pops on both sides, usually with quite a loud noise, watch out you don’t frighten your pets.
Keep an eye on the pumps pressure gauge if it has one. At this point the tyre should hold pressure reasonably well, even without sealant. If it doesn’t then there may be a problem with the rim tape or the valve sealing with the rim. Note that some tyres are porous and will leak air until sealed with sealant. If pressure is being lost put the wheel into a sink of water to see where its coming from. If air is coming from the small hole on the rim near the valve, then the problem is the valve sealing or the rim tape, so you will need to remove the tyre and investigate.
Adding Sealant
Some sealant like Silca V2 can be added through the valve with the core removed. This is highly recommended as adding it into the tyre inevitably ends up with some on the floor.
If the sealant can’t be added through the valve, then one side of the tyre will need to be popped off the rim and the sealant poured in before reinflating to seat that side of the tyre again.
The recommended amount will depend on the sealant itself and the tyre size. It’s better to add too much than too little.
Here’s a guide from Silca on how much sealant to use
700 x 28 55ml
700 x 32 65ml
700 x 40 80ml
700 x 42 85ml
700 x 45 90ml
700 x 50 100ml
Shake the bottle of sealant then remove the cap, extract the required amount of sealant with the injector syringe. Then hold the injector with the tube up to stop it leaking out.
Put the top back on the sealant in case it gets knocked over (thank me later).
Turn the wheel so the valve is at the 9pm/3pm position or slightly above and put the injector plastic tube over the valve. While doing this keep the injector pointing up to avoid sealant dripping out all over the floor.
Push the injector gently until all the sealant is in the tyre, pushing it too hard might result in the sealant clogging the injector, if this happens withdraw the plunger a bit and try again. Wash the injector out with water afterwards so it isn’t all gunked up for next time.
Inflate the Tyre
That’s the hard part over, now reinsert the valve core, tighten it with the core removal tool, avoid tightening too much and turning the valve itself which could break the seal.
Reinflate the tyre to the desired pressure, noting the recommended tyre and rim pressures, as tubeless rims (especially hookless) can have lower maximum pressures than some tyres. 73 psi is the standard maximum for hookless, but check the specs for your setup.
Now spin the wheel vertically and horizontally to make sure the whole tyre is coated in sealant. This is particularly important for porous tyres that require sealant to be fully airtight.
The wheel is ready to ride, but its best to leave it for a few hours to make sure it holds pressure.
Maintenance
Tubeless needs maintenance. Setting a calendar reminder to do this helps.
Sealant dries out over time, especially in hot weather. See how much is left by using a small cable tie as a dipstick after removing the valve core.
Porous tyres need topping up more often, and any sealant lost from unsealed punctures also needs to be replaced.
Replace all the sealant at the interval recommended by the manufacturer.


0 Comments